A step-by-step guide on how to make chopsticks for repotting season
Within the practice of bonsai, bamboo is an incredibly durable and functional material. Of its many uses, making customized bamboo chopsticks for the repotting operation allows us to have total control of the contact between the soil particles being added and the roots of our tree.
This step by step guide to chopstick creation outlines the fundamental process to fabricate bamboo chopsticks that are accurate, functional, and of quality design for use in the most simple or pivotal repots. It’s our goal to create comfortable tools that are capable of prolonged periods of use over the duration of the spring repotting season.
Before we can start the process of chopstick creation, we have to source bamboo that has long internodes and thick walls. An internode on bamboo is the smooth section between two raised joints. Internodes 8 inches or longer with walls ¼-¾” thick make the most functional chopsticks for bonsai.
The longer the internode on a round, the longer the chopsticks we can create. When repotting larger trees or trees in deeper containers we need chopsticks that reach the bottom of the container or the center of the root mass. An added benefit to a long chopstick is longevity. While repeatedly sharpening the bamboo over successive repots keeps our chopsticks sharp and functional, it does slowly reduce their length. The greatest indication repotting season is over is when our chopstick bin is full of well worn bamboo nubs and our garden is alive with vibrant, happy bonsai.
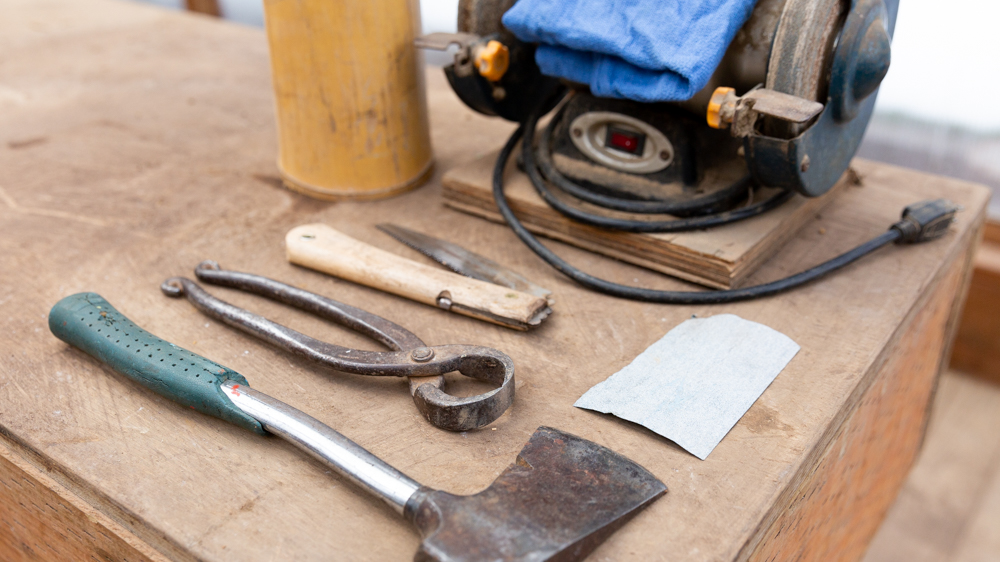
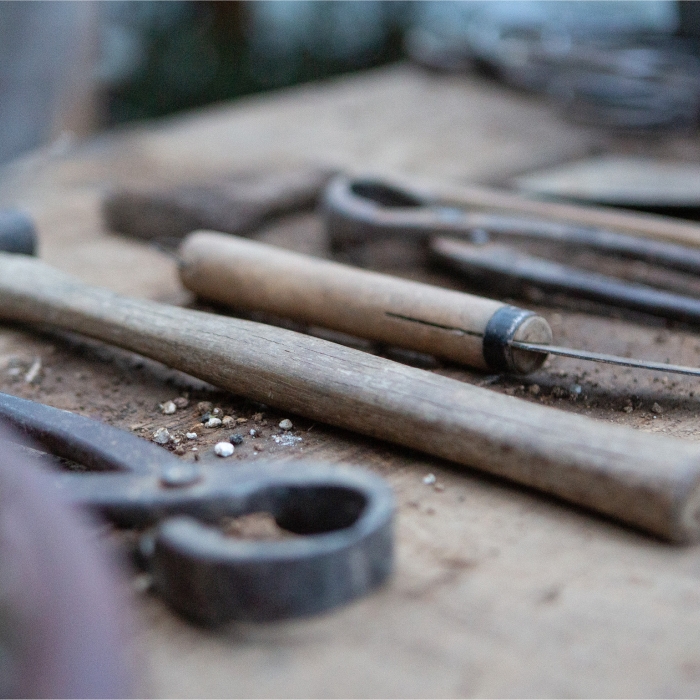
Chopstick Supplies:
Bamboo Pole/Round
Saw
Hatchet
Root Cutter
Sanding/Grinding Wheel
Sand Paper
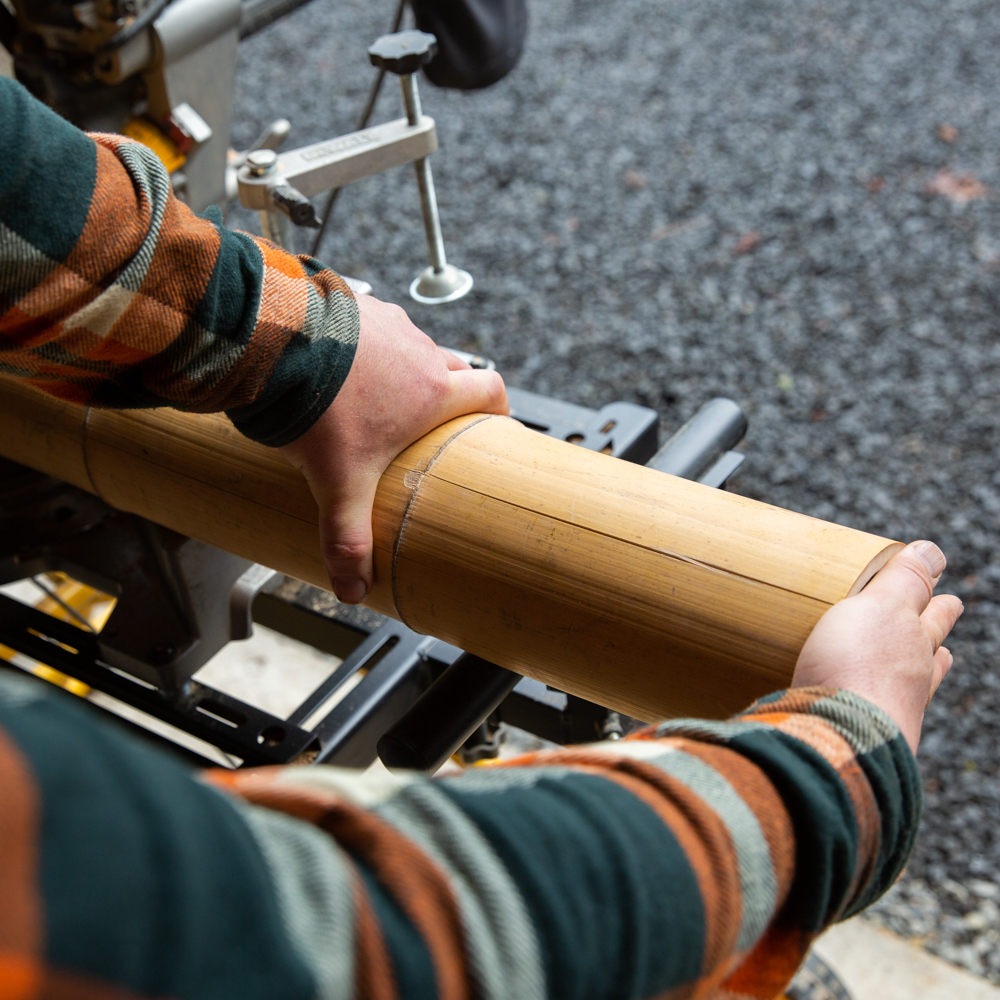
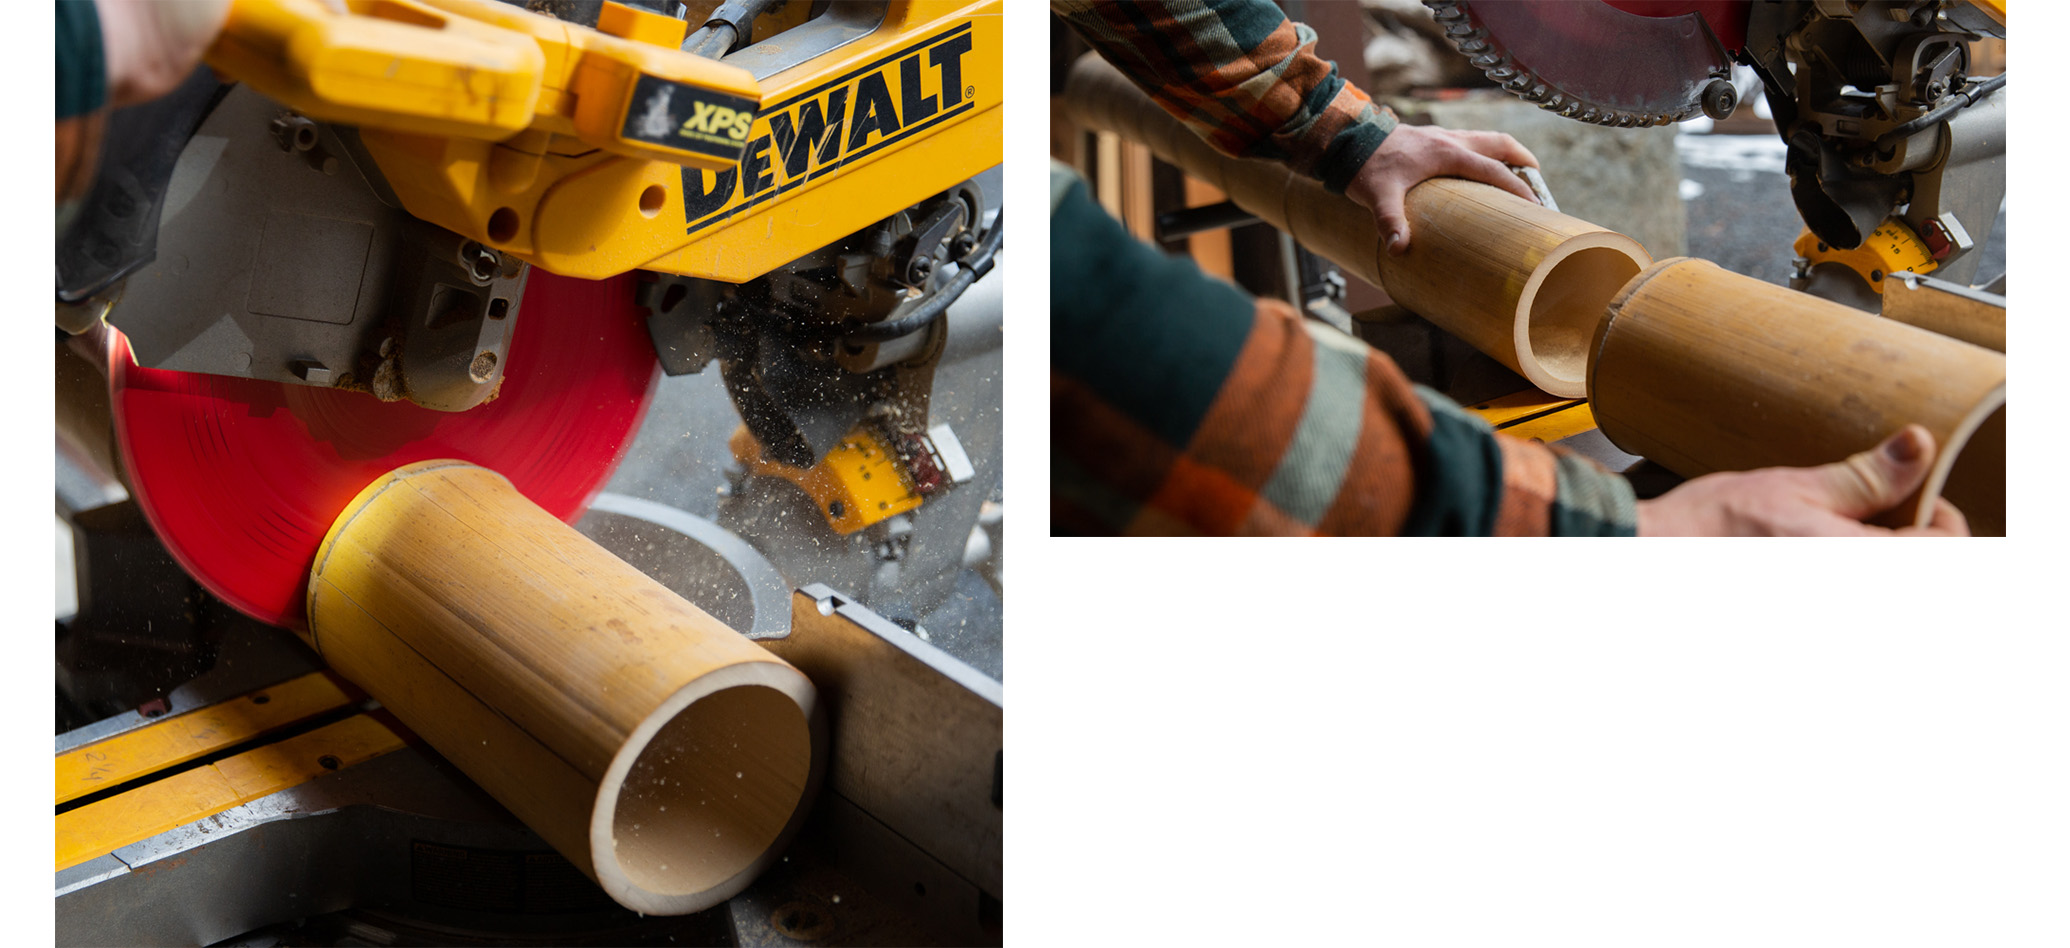
Step one - cut the bamboo into rounds
If we are starting with a bamboo pole consisting of multiple internodes we'll want to cut it down into single internode lengths. A single internode of bamboo can create a plethora of chopsticks, but we never want to try and create chopsticks that are more than a single node long. The swelling at each node does too much damage if it passes into the container crushing soil and breaking roots.
Cut each piece of the round just above the next node leaving a long straight run of bamboo joined to the swelling of its connected node. The swelling serves as the handle of the eventual chopstick.
The longer the node and the thicker the wall the more variable and customized we can make our chopsticks. This allows us to create chopsticks for trees of all shapes and sizes.
Step two - split the bamboo round in half
Taking our single internode from step one, we split the bamboo round in half following the grain. We typically use a hatchet, but a maul or an ax will also work. Be sure to split the round down the middle or as close as possible so the walls of our eventual chopsticks will be straight.
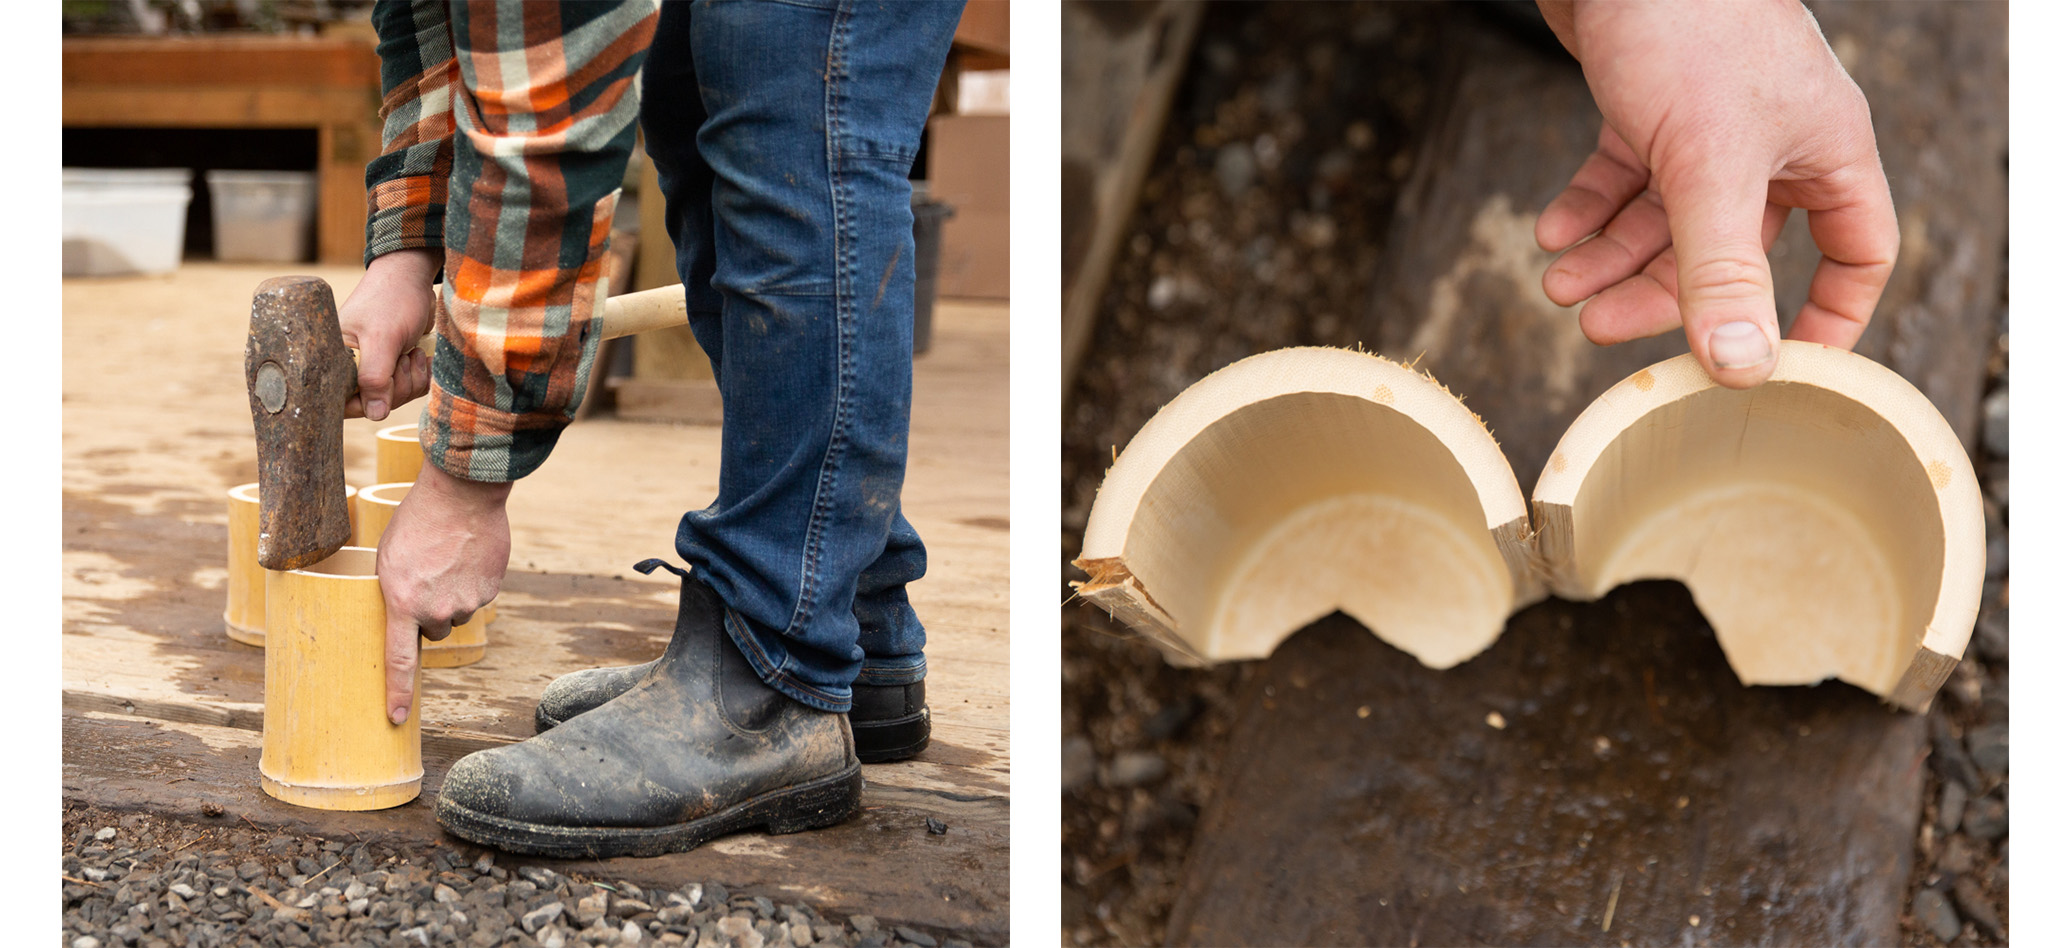
Once we start to split the cylinder of bamboo, it should naturally open up and come apart in perfect 50/50 halves. From this point forward we can put the ax away and use root cutters to further divide the bamboo into usable widths.
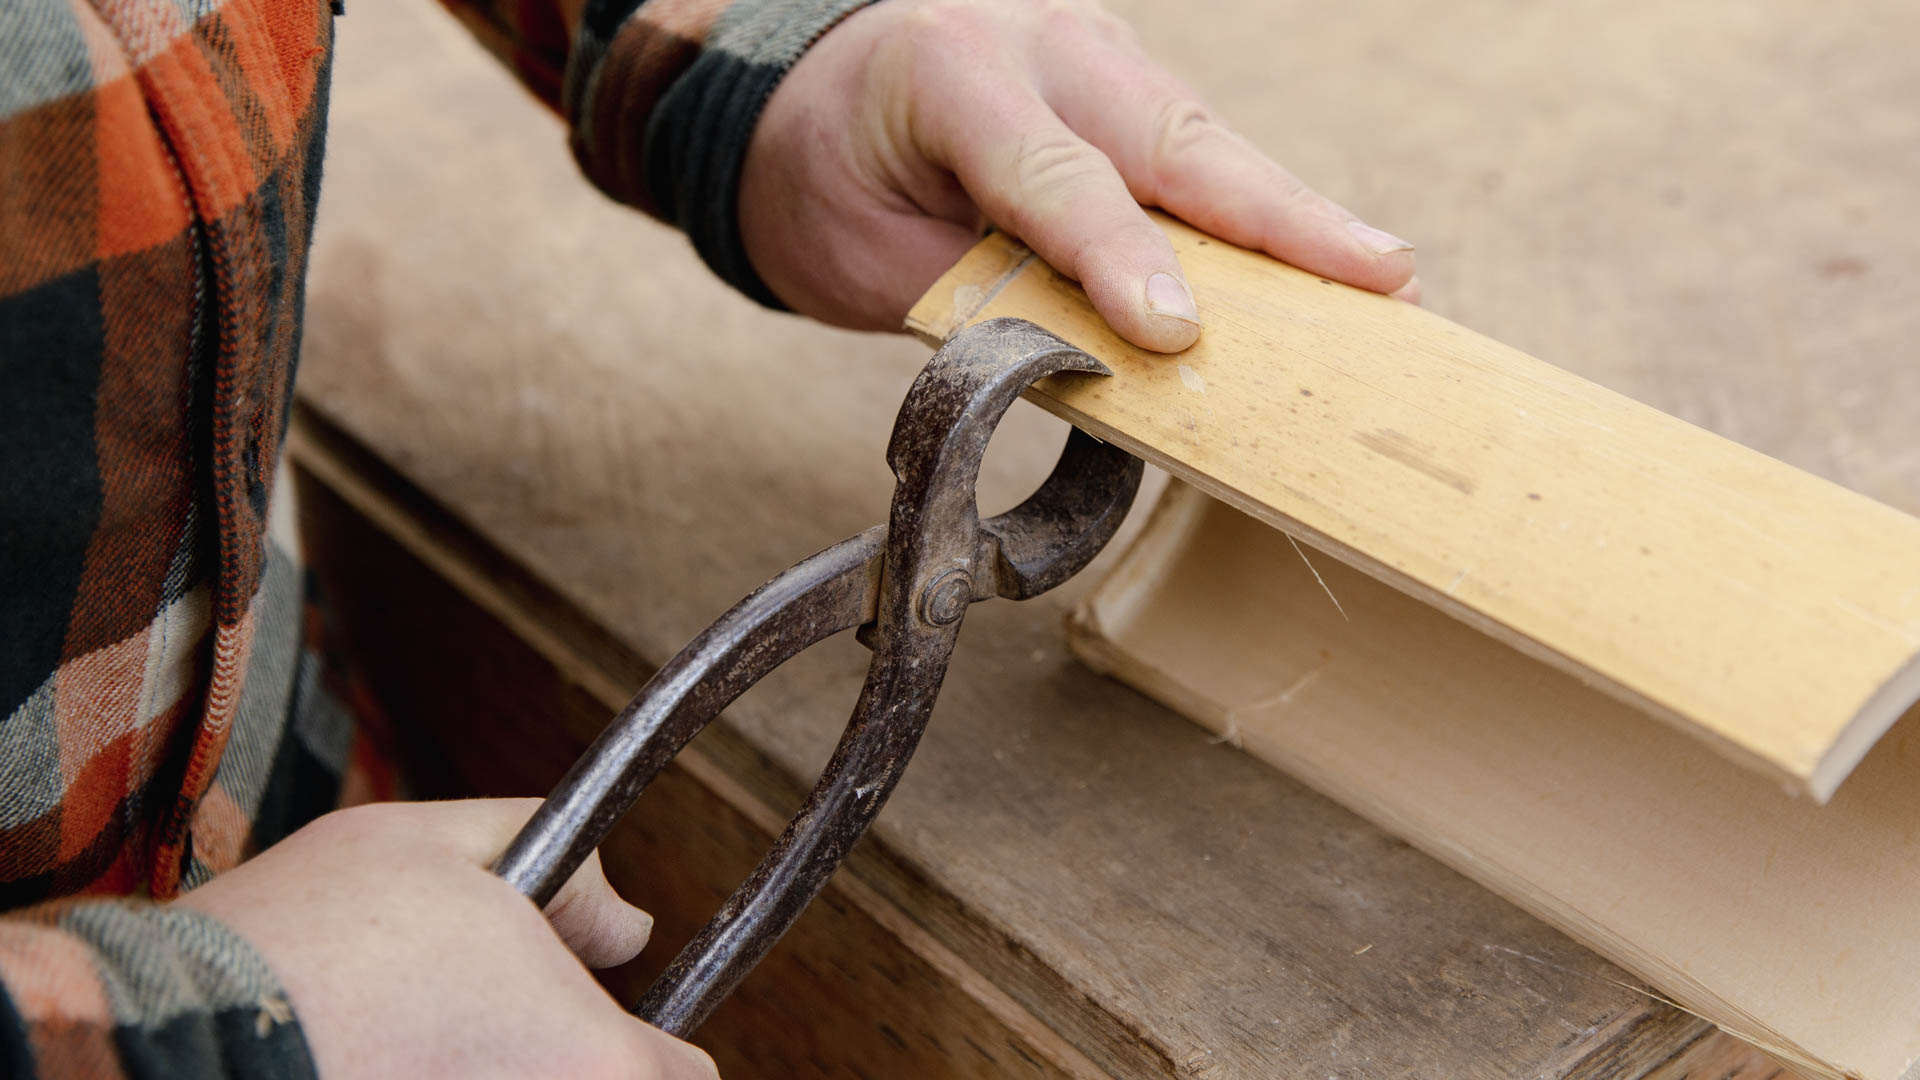
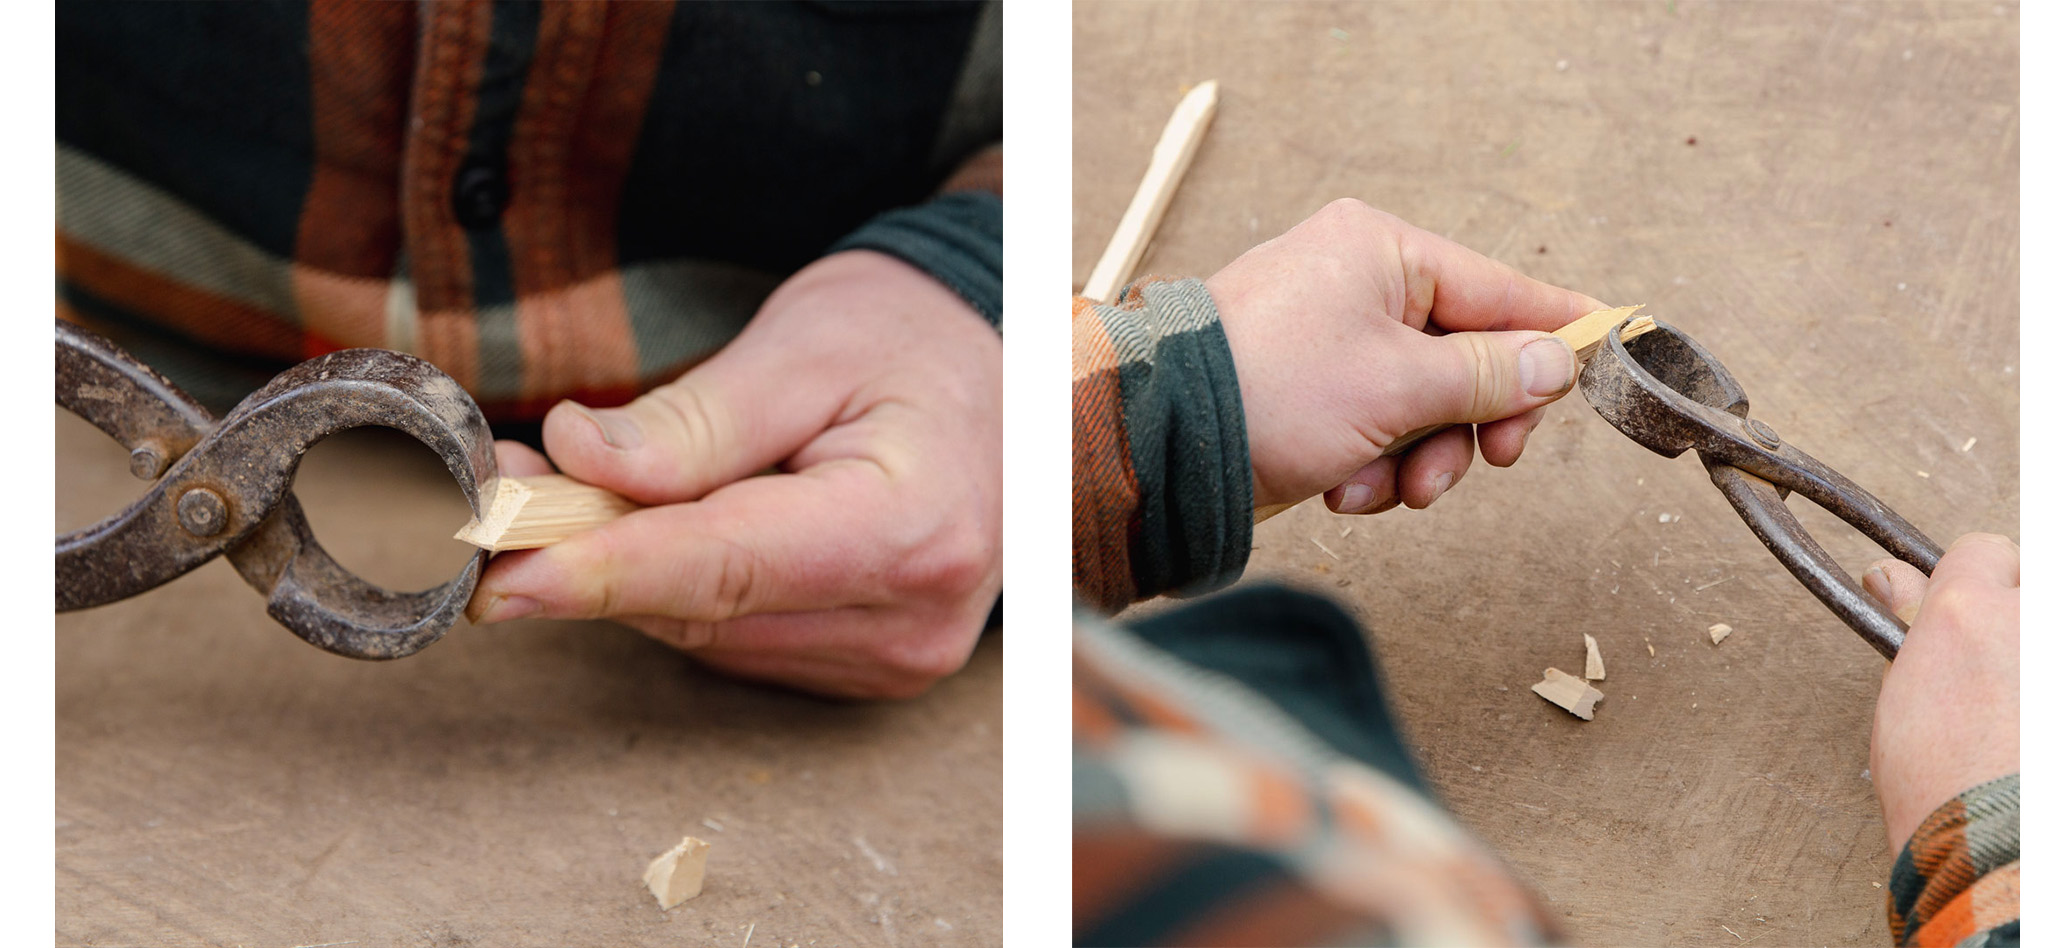
Step three - seperate desired width
Use the root cutter to segment off the desired width of our eventual chopstick from our straight-walled half-sphere bamboo round. The width of the chopstick is determined by the size of tree(s) we plan to repot. For smaller trees a more narrow width in our chopstick is appropriate.
Place the blades of our root cutter parallel to the bamboo grain anywhere along the run of the grain focusing on positioning the blades the desired width from the edge before cutting. Apply force to encourage the tool to cut the hard outer shell of the bamboo. The bamboo will pop when the root cutter penetrates its outer wall and should split freely along the grain. Maintain the desired width by flexing your root cutter to separate the chopstick from the round.
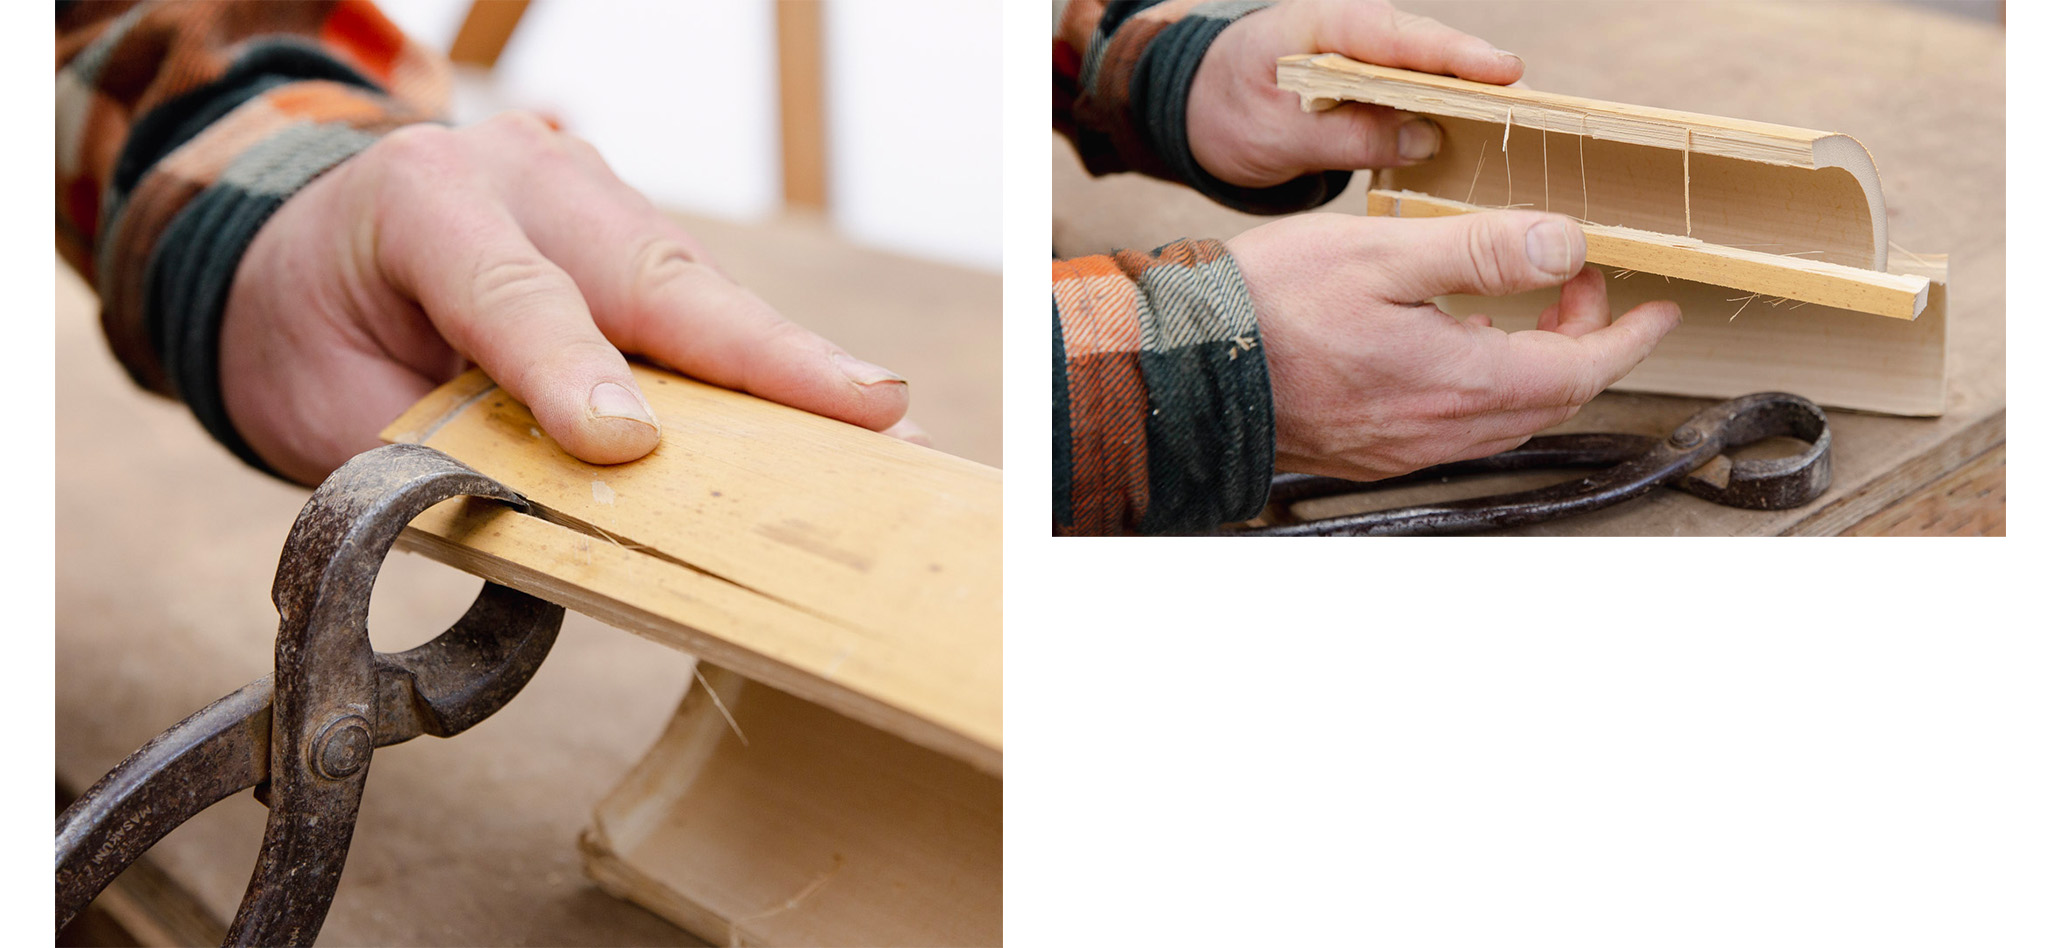
Step four - form the tip
Make three concise cuts at the tip of our chopstick, again using our root cutter (smooth end, not swollen end). Cut 1 creates a 45 degree angle from the soft interior wall of the bamboo tapering out to the hard outer wall.
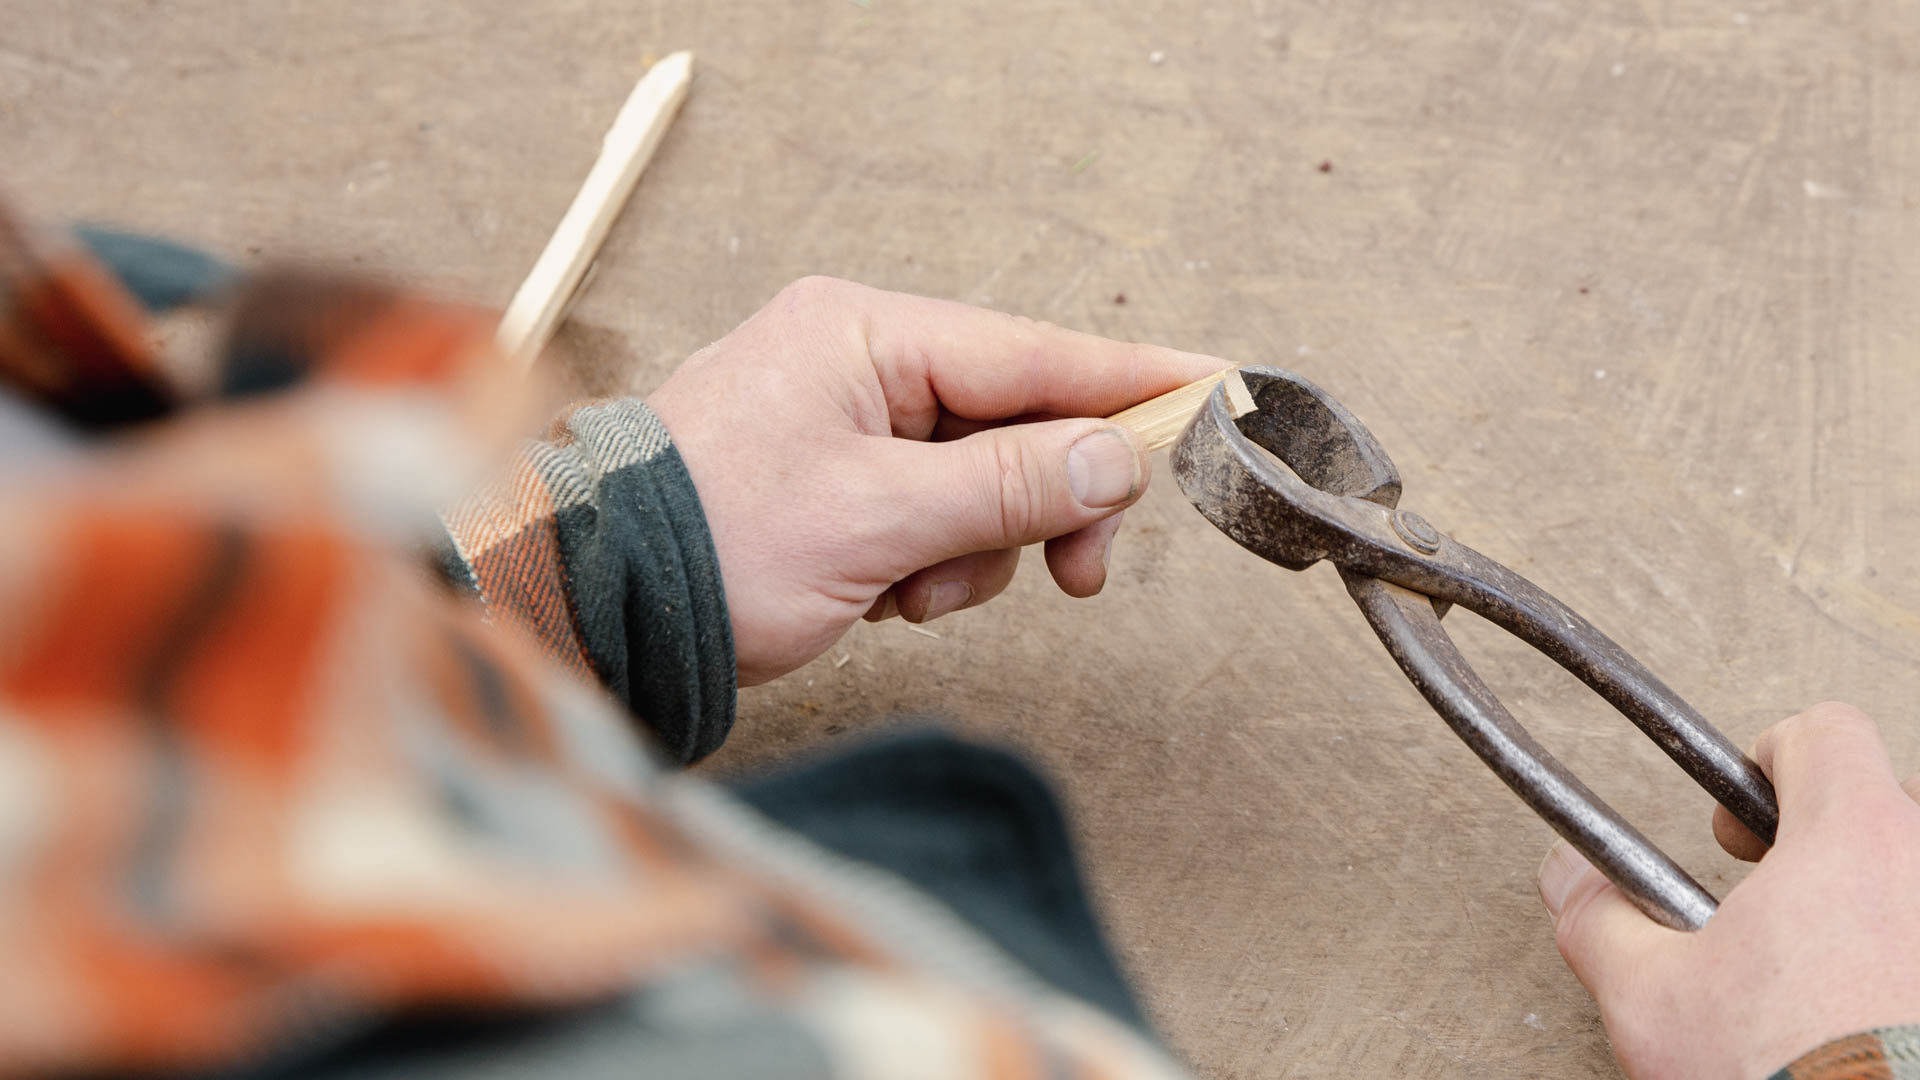
Cut 2 creates a 45 degree angle from the center of the tip of our hard outer wall tapering out to the left edge. Cut 3 makes the same cut on the opposite side forming a sharp point on the hard outer wall leaving 3 beveled surfaces on the three softer interior sides. The hard wall of our bamboo should always be the flat bottom or under-belly of our chopstick and all softer surfaces will be beveled.
The final result should look like the nose of a bullet train, with the bottom of the bullet train being the hard side of the bamboo.

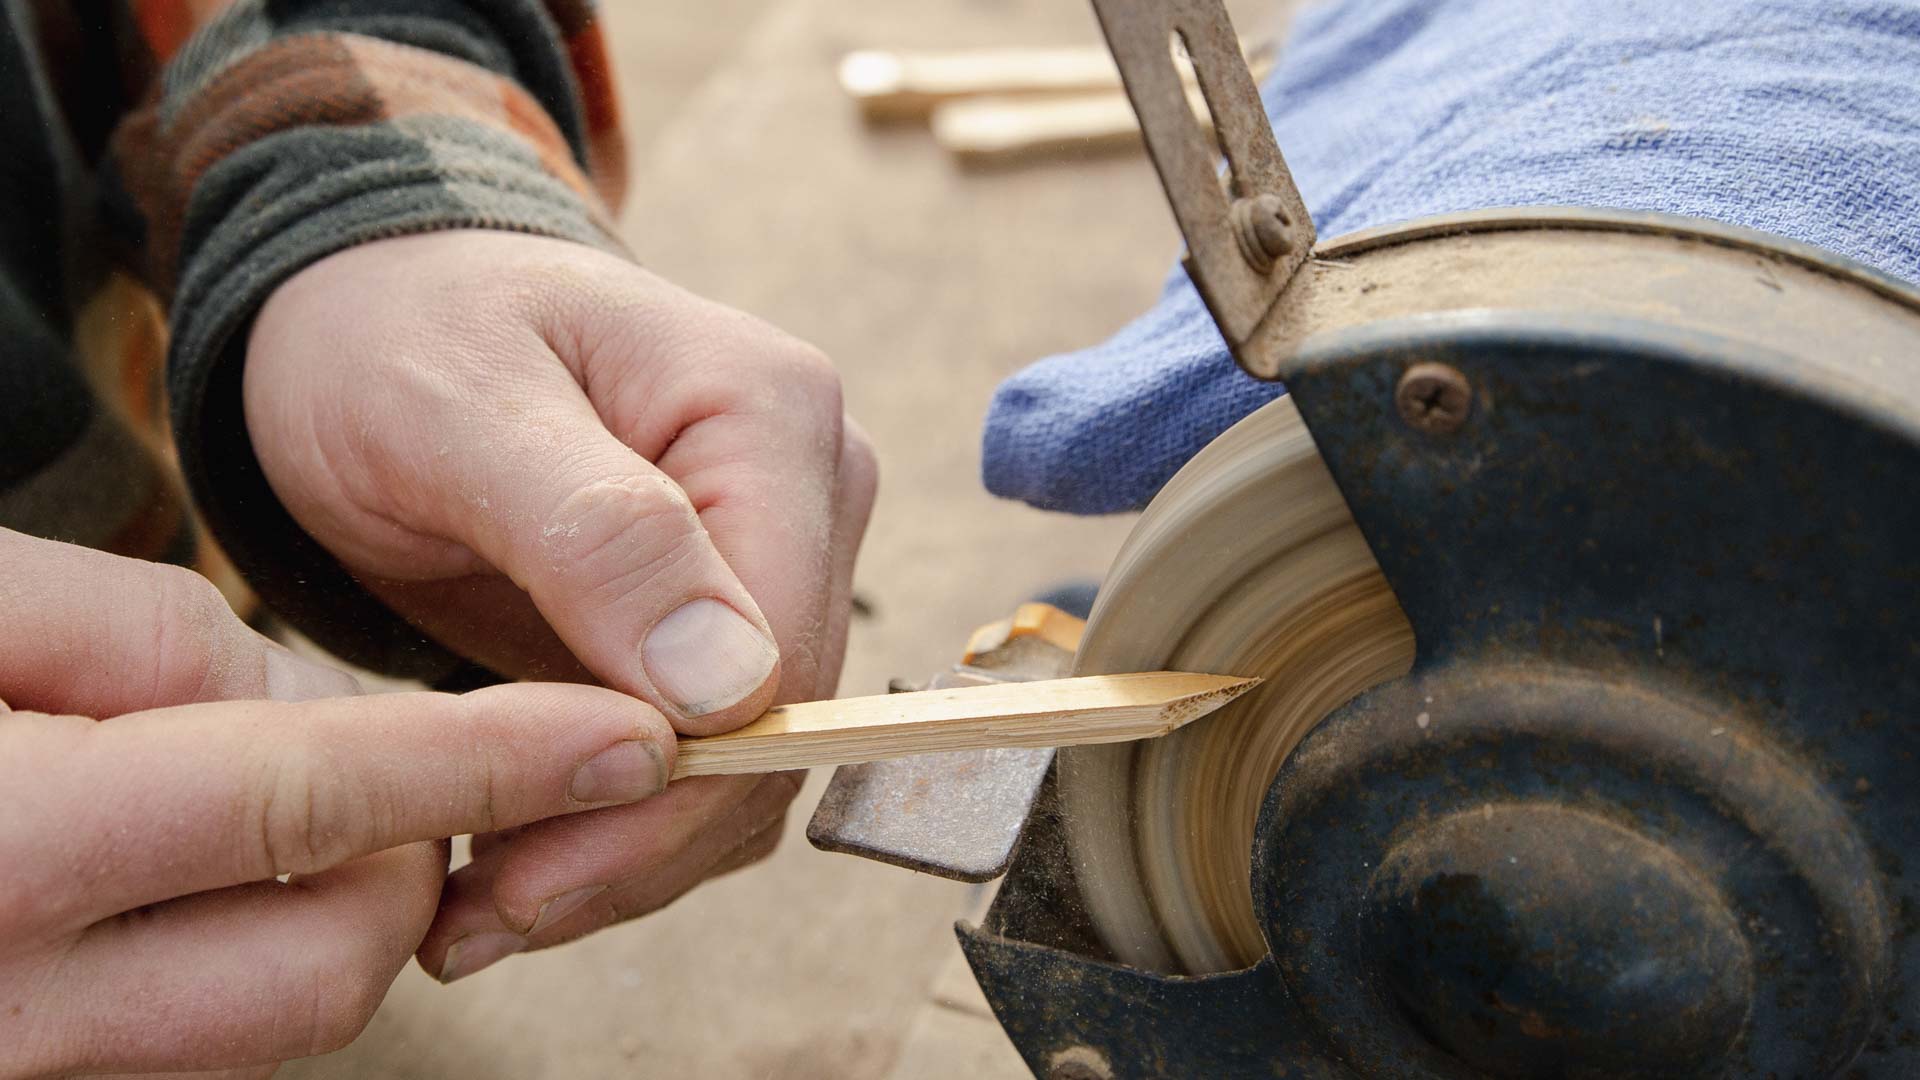
Step five - customize the chopstick
Before sanding, examine the width and the thickness of the overall chopstick. The thickness and width should be equivalent. Use your root cutters to remove the soft interior wall, reducing the thickness to be proportional to the width. The stick can be more rectangular than square, as long as the width of the stick is greater than the thickness.

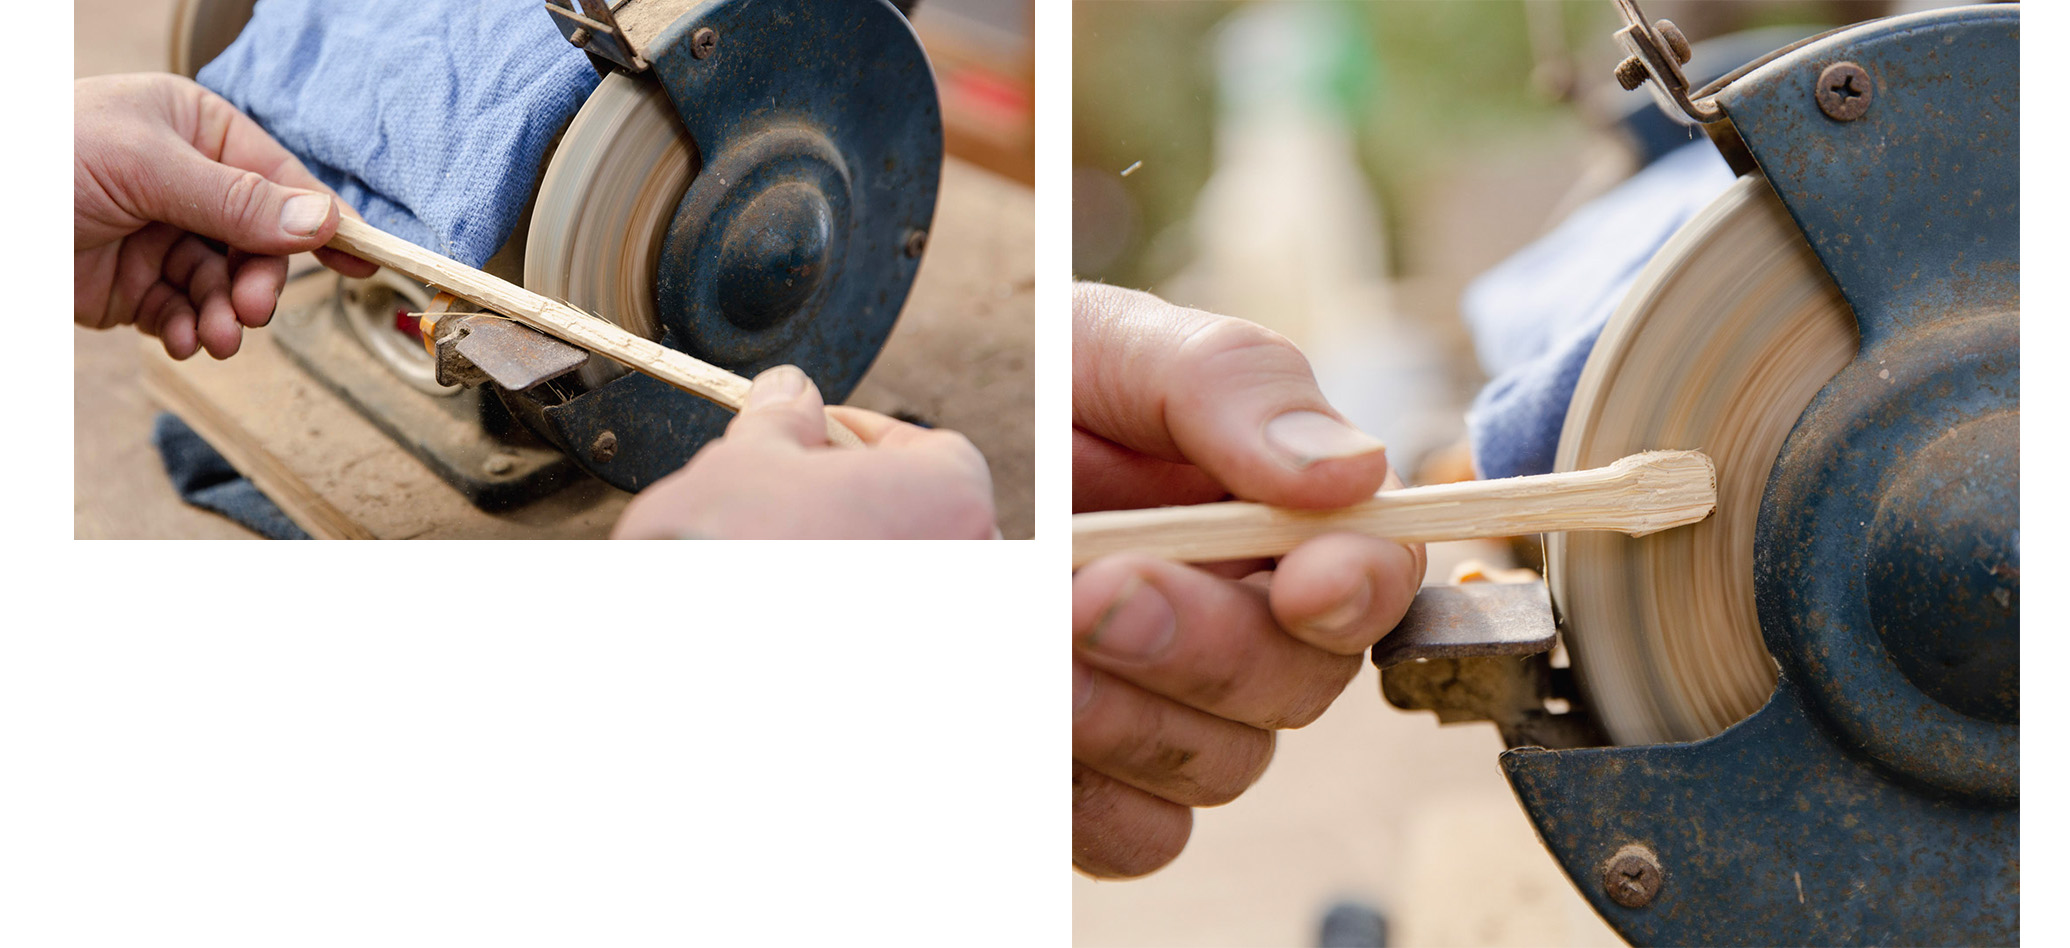
Using a grinding wheel or a sanding belt, smooth out the transition of the cuts from Step 4 at the tip of our chopstick. Grind away the cut marks to form clean angles on the face as well as the tapered points until the stick is very sharp. We want the angle of the face and sides of our chopstick to be 65-70 degrees.
Long and gradual taper moves soil with intention, but is subtle enough to not break or crush the particles. Again, think about the nose of a bullet train elongated and subtly cutting through the air. Make your chopstick aerodynamic and the roots will thank you.
Unlike culinary chopsticks, that are tapered on all sides, we want our bamboo chopstick to have a flat, hard bottom without a bevel. The durable outer wall holds the soil beneath it in place, while the beveled faces push soil off of their angular surfaces in the desired directions. A sharp tip ensures the chopstick will cause minimal soil compaction and inflict clean, healable wounds to a root should there be contact.
Once the face and tip have been formed, we finish customizing the chopstick by taking the edges off of both the interior corners and the sharp exterior corners along the length of the bamboo. Focus on rounding the corners and edges of the node that was left intact so that it becomes very smooth, contoured, and comfortable to hold. This will be our handle for every tree this chopstick helps us successfully pot.
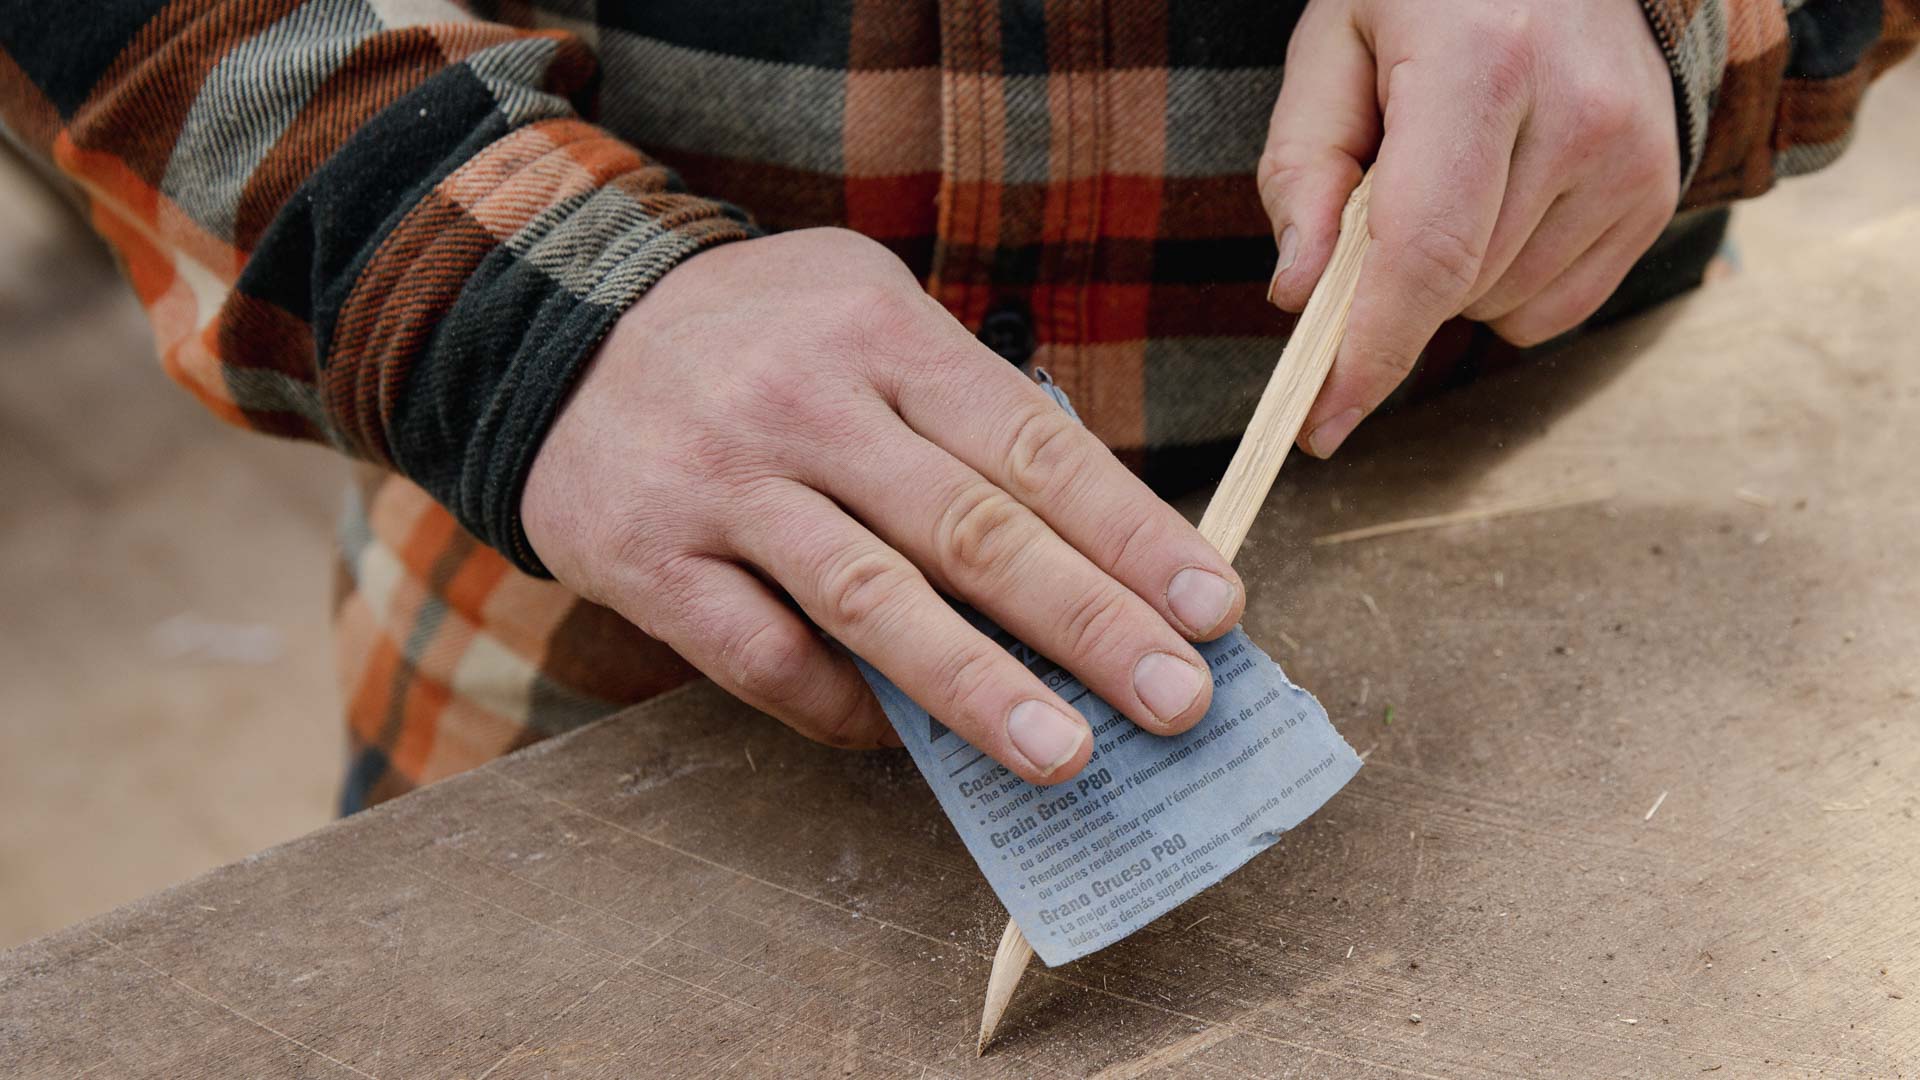
Step six - refine the chopstick
To sand and smooth the chopstick, rub the soft wood surfaces wtih 100 grit sandpaper following the direction of the grain. Remove all sharp edges, ridges, bumps, and slivers that lift off the wood. Be sure to avoid sanding the hard exterior surface. We can stop when our chopstick is to our liking.

Improve our repotting technique and enhance our bonsai practice by making our own chopsticks with this step-by-step guide. We can achieve better results, do less damage, and feel more comfortable as we set our trees up for success in the growing season to come using a trusted and well-made chopstick to lead the way.
Need more support? Check out our Chopstick Creation video for a more detailed description of each step.